DIY Adirondack Rocking Chair - a Relaxation and Craftsmanship
There's something special about a rocking chair. It's a piece of furniture that has the power to transport you to a state of relaxation and tranquility. And when that rocking chair is an Adirondack rocking chair that you've built with your own two hands, that feeling is even more special.
As a DIY enthusiast, I had always wanted to try my hand at building an Adirondack rocking chair. I had seen them in photos and on websites, and I knew that they were the perfect combination of style and comfort. So, I decided to take the plunge and build my own Adirondack rocking chair from scratch.
Researching the Perfect Design
The first step in building any piece of furniture is to find the perfect design. I spent hours scouring the internet for plans and ideas, looking for the perfect Adirondack rocking chair design. I wanted something that was both comfortable and stylish, with a classic Adirondack look.
Finally, I stumbled upon a great design on the Anything Yes blog. The plans were detailed and easy to follow, with step-by-step instructions and clear diagrams. I knew that this was the design that I wanted to use for my Adirondack rocking chair.
Gathering the Materials
With the plans in hand, I set out to gather all of the materials that I would need to build my Adirondack rocking chair. I made a list of everything that I would need, from the wood to the screws and bolts, and headed to my local home improvement store.
At the store, I spent a lot of time carefully selecting the perfect pieces of wood for my chair. I wanted to make sure that the wood was strong, durable, and had a beautiful natural grain. I ended up choosing a beautiful cedar wood, which I knew would be perfect for my Adirondack rocking chair.
Building the Chair
With all of my materials gathered, it was time to start building my Adirondack rocking chair. I set up a workspace in my garage, with all of my tools and materials laid out and ready to go.
Building the chair was a slow and steady process. I followed the plans carefully, measuring and cutting each piece of wood to the exact specifications. I used my power drill and saw to create the joints and connect the pieces of wood together.
As I worked, I could feel myself becoming more and more connected to the project. Each time I completed a step, I felt a sense of accomplishment and pride. This was my Adirondack rocking chair, built with my own two hands.
Finishing Touches
Once the chair was complete, it was time to add the finishing touches. I sanded the chair down to give it a smooth finish, and then applied a coat of sealant to protect the wood from the elements.
Finally, I added a set of comfortable cushions to the seat and back of the chair. I knew that this would make the chair even more comfortable and inviting, and would be the perfect finishing touch.
Relaxing in My Adirondack Rocking Chair
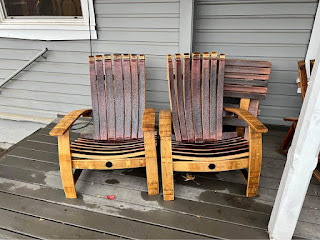
Now that my Adirondack rocking chair was complete, it was time to sit back, relax, and enjoy my hard work. I placed the chair on my front porch, where I could sit and watch the world go by. It was the perfect spot to unwind after a long day, or to enjoy a cup of coffee on a lazy Sunday morning. As I settled into the chair for the first time, I could feel the stress of the day melting away. The gentle rocking motion was soothing and calming, and the cushions made the chair incredibly comfortable. I knew that I had made the right decision in building my own Adirondack rocking chair. Over the coming weeks and months, my Adirondack rocking chair became my go-to spot for relaxation. I would spend hours sitting in the chair, reading a book or just enjoying the scenery. It was the perfect addition to my home, and a testament to the power of DIY craftsmanship.


Comments
Post a Comment